The Under $100 Kitchen Refresh
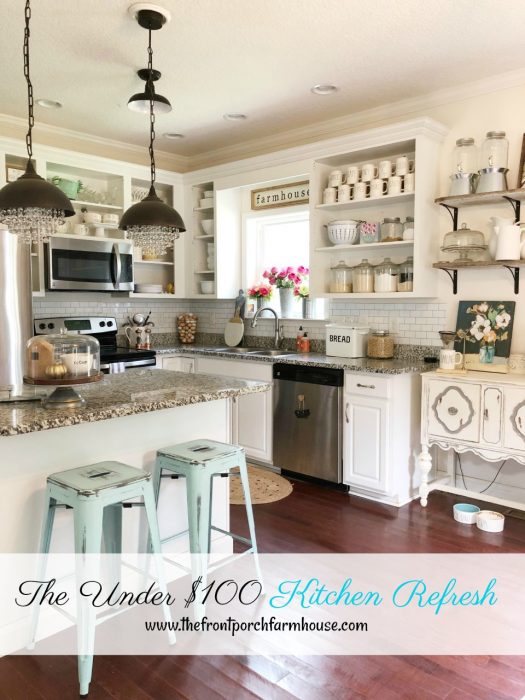
We have a builder’s kitchen, meaning nothing is customized and it’s a little on the small side. When we picked out the cabinets, granite, and door pulls, I had a few options I could look at and I just pointed to the ones I liked best. Nothing special compared to the many custom (and large) kitchens I sometimes envy on Instagram. But I spend a lot of time in my kitchen and I found myself brainstorming ways to give it a little bit more character…more me. And today, I present to you the results…the under $100 kitchen refresh.

Voila, open shelving! Does it get any easier than just taking your cabinet doors off?
I thought about some of my favorite kitchens on IG and what I loved most about them and open shelving was a common theme. If you can pull it off, open shelving immediately gives your kitchen character. Instead of seeing white cabinet doors, people get a glimpse of what you love and use in your kitchen. It can be tricky business because you want the items to be useful, but they also need to be pretty. And there has to be a bit of coherence going on.
But let’s talk about the biggest obstacle to open shelving in a three year old kitchen. I had brand new cabinets. My husband (and me too, if I’m honest) wasn’t too keen on ripping out the cabinets to put up open shelving. I accepted the fact that open shelving just wasn’t going to happen any time soon. Until I saw a picture on Instagram and I realized that the open shelving in this particular kitchen was actually cabinets with the doors taken off.
Shut the front door! I could just take the cabinet doors OFF!? And, voila!–we have open shelving! I will do a blog post soon and talk about how I had to go through all of my kitchen cabinets (which were a hot mess) to make open shelving work in our home. But for the purpose of this post, what we need to know is…
Cost: $0

Why, yes. That’s peel and stick backsplash.
Next up: backsplash! I’ve been wanting subway tile backsplash for awhile in the kitchen. I know it’s a pretty inexpensive project to put up the real thing, but we just haven’t gotten around to it. I saw a couple of accounts used a peel and stick subway tile in their kitchen and it looked like the real thing! “I can do this,” I thought. So I bought two packages of this stuff and an exacto knife.
I’m going to be real with you guys. In the middle of this project (which took about two and a half hours), I had some regret. It was hard to line up at first and there are some spots that are pretty obvious screw ups to me and my husband. But I got the hang of it and after it was completed, I really liked it. I’ll eventually have the real thing put up, but I’m happy with this stuff for now.
Cost: $70
And there you have it, these two changes have made a huge impact on my kitchen! It has more character and it didn’t break the bank!
AND…one of the biggest impacts to our kitchen is the amazing light fixtures I got for Christmas. I buy myself the best gifts! lol You can find them here (if they aren’t currently sold out). I’m not including them in the cost of the refresh because they were hung almost a year ago, but I get asked about them a lot and wanted to mention them here. 🙂